Continue Family Traditions This Easter

Red NESCO Roaster Oven With Easter Ham

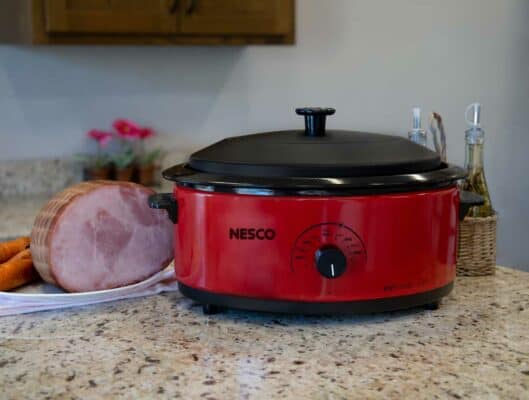
NESCO 6 Qt. Roaster makes Easter ham prep easy

Easter is a time of family and traditions. For some, they have been prepping for 40 days, culminated by a busy Easter weekend filled with activities and traditions started generations before. All of it wrapped up with family gathered for an Easter meal cooked in Grandma’s NESCO 6 Qt. Roaster.

Decorating Easter eggs and Easter egg hunts are traditions a lot of us grew up with. The Easter bunny and chocolate eggs took center stage on Easter morning. The highlight, however, was the afternoon meal at Grandma’s, planned around the traditional Easter ham, with the whole family gathered around the table sharing stories.

Easter is a time for family. There’s no reason to spend all your time in the kitchen though. So pull out Grandma’s roaster or get your own NESCO 6 Qt. Roaster to start your own tradition.

The NESCO 6 Qt. Roaster allows you to spend more time with those you love

NESCO’s 6 Qt. Roaster frees up your time so you can enjoy hunting for Easter eggs or laughing and talking with your family. It allows you to ‘set it and forget it,’ as well as freeing up your oven for other dishes and sides. It also has a removable cookwell making it easy to serve and to clean.

Ham is a staple at American Easter celebrations for many reasons. Traditionally, farmers turned to ham because it was seasonal and inexpensive compared to other holiday meats like lamb.

The Easter ham is usually fully cooked, and only needs to be reheated. They come whole, half, bone-in, semi-bone or boneless varieties. All varieties can be prepared in a NESCO 6 Qt. Roaster.


Providing families with the opportunity to gather around nutritious food has always been important to NESCO. Need a good recipe for an Easter ham? NESCO’s honey-glazed ham recipe features a delicious homemade glaze, but there are also a few things you should know before diving in.

  1. Make sure you get a fully-cooked ham.
  2. Your ham should be big enough to serve 1/3 lb to each person.
  3. Don’t apply the glaze until the ham is approximately 3/4 of the way done.
  4. Use a quality meat thermometer to make sure your ham is heated thoroughly.


This Easter start your own family tradition or continue the ones you already have. Invite the family over, get an Easter ham and let NESCO take care of the rest.

NESCO: Your Key Ingredient

At NESCO, we believe life is an occasion worth celebrating. We’re dedicated to being Your Key Ingredient in those celebrations by making cooking enjoyable again with our complete line of innovative small kitchen appliances and accessories. NESCO began as the National Enameling and Stamping Company and created the first Roaster Oven in 1931. NESCO is currently headquartered in Two Rivers, Wisconsin.

To purchase a NESCO 6 Qt. Roaster or other products visit https://nesco.com or for more information call 1-800-288-4545.

Tags: jerky gun


Black Friday Slow Cooker Turkey Soup

Black Friday Slow Cooker Turkey Soup

Your Key Ingredient:

NESCO 6 Qt. Slow Cooker

Grocery Ingredients:

3 cups cooked turkey, chopped (no bones)
3 carrots, peeled and chopped
3 stalks, peeled and chopped
3 stalks celery, chopped
4 medium white potatoes, chopped
1 large white onion, chopped
6 cups broth
2 cloves garlic, minced
1 teaspoon thyme
12 ounces egg noodles

Instructions:
  1. Add all ingredients except noodles to NESCO® Slow Cooker. Cook on High for 4 hours, or Low for 8 hours.
  2. Add noodles in the last half hour of cooking.
  3. For extra flavor, top with leftover stuffing when serving.


Pumpkin Spice Pressure Cooker Cheesecake

Pumpkin Spice Cheesecake Lifestyle Above View

Smooth, fluffy, and rich, cheesecake is a favorite among most dessert lovers. The only problem with this treat is that it typically takes a long time to bake. Cut down on prep time by using a NESCO Pressure Cooker instead of a traditional oven. The moisture in the Pressure Cooker makes baking cheesecake easier because it cooks evenly all the way through, preventing an overcooked edge and soft middle.

The trick to making a smooth cheesecake that’s lump-free is to make sure that all of your ingredients are at room temperature before your start. Cold cream cheese and eggs can lead to chunky batter and over-mixing can add too much air, resulting in a cracked surface.

Grocery Ingredients:

Crust

1 cup vanilla wafer cookie crumbs (use a food processor or blender)
2 Tbsp butter, melted

Filling

1/3 cup brown sugar
1/4 cup real maple syrup
2 large eggs, room temperature
4 tsp cornstarch
1 1/2 tsp pumpkin pie spice
1/3 cup white sugar
16 oz cream cheese
8 oz canned pumpkin
2 tsp vanilla extract
2 cup water (in the cooker)

Topping

1/2 cup chopped pecans
1 cup heavy whipping cream
3/4 cup real maple syrup

Instructions:

Crust

Mix crumbs and butter together and press into the bottom of a 7″ springform pan.

Filling
  1. Blend sugars, cream cheese, and maple syrup in bowl until smooth. Add eggs one-by-one, beating on low just until blended (do not overmix). Gently whisk in the pumpkin, cornstarch, vanilla, and pumpkin pie spice.
  2. Pour mixture over the crust. Add water and rack to Pressure Cooker. Tear off a 20″ piece of aluminum foil and fold into thirds, lengthwise to make a sling for your pan. This helps to remove pan after cooking is complete.
  3. Place springform pan on foil and lower into cooking rack. Cover and lock lid in place. Turn regulator knob to PRESSURE. Program for HIGH pressure and cook for 20 minutes. After cooking time, release pressure using the quick-release method. Unlock and open lid. Remove cheesecake from Pressure Cooker by lifting up the end of the foil sling. Let cool to room temperature. Refrigerate at least 3 hours, but preferably overnight.

Topping

  1. Toast pecans using BROWN/SAUTE function, add nuts to cooking pot and stir for 3-5 minutes or until lightly browned.
  2. Next, combine whipping cream and maple syrup in cooking pot. Bring to a boil still using the BROWN/SAUTE function, stirring occasionally until sauce is slightly thickened about 10-15 minutes. Pour over well-chilled cheesecake and refrigerate until well-chilled.
 
Cheesecake close-up


6 Steps To A Stress Free Dinner Party

Friends At Dinner Party

1. Consider Doing a Theme

Themed dinner parties are great fun because they can expose you to foods you and your guests wouldn’t normally eat. Mexican, Italian, Thanksgiving in July, or a movie-themed party are fun ways to get creative with it. Hosting a themed party can make planning a menu easier because the menu almost plans itself. Get into it with decorations, costumes, and music revolving around your theme.

2. Plan the Menu

Deciding what to create (and how to do it), is the greatest challenge of any dinner party. Obviously, you want to show off your best dish, but cooking a time-consuming chicken galantine won’t do anyone any favors. Main dishes that are hearty enough to be made ahead of time are ideal, so you can spend more time entertaining your guests, and less on last-minute prep. For this, Slow Cooker and Pressure Cooker recipes like Root Beer Pulled Pork Sandwiches or Lasagna are perfect. Despite being effortless, they taste like you slaved over a hot stove all day.

Just because side dishes are called “sides”, doesn’t mean they can’t have the wow factor that your entrée does. When choosing sides, go for something with complementary but different flavors than your main. Cornbread compliments a pulled pork sandwich because it brings sweetness to the salty and savory flavors of the pork, while roasted green beans will bring a crunch to round out the textures. Two to three side dishes are typically enough to complete the meal without overcrowding your table and palate.

Don’t neglect the h’ordeuvres, but there’s no need to go overboard. Unless you’re throwing a wine and cheese party, one or two light appetizers will do to avoid premature food comas. If you’re worried about saving time, it’s okay to go with store-bought (whether you admit that to your guests or not is up to you). Cheese platters, ham roll-ups or a buffalo chicken dip are all easy ways to keep your guests satisfied while waiting for the main show to begin. Plan to have your sides done and ready in the Roaster when your guests arrive so all you have to do is plate and serve.

3. …Then Your Guest List

Your guests are the heart of your dinner party. Similar to your menu options, less can be more. When planning your numbers, keep in mind how much space you have in your house as well as, realistically, how many people your recipe will feed. It’s better to have leftovers for the next few days or to send with guests than it is to run out of food. Sending invites for a dinner party is typically done about two weeks ahead of the date to give a proper response and planning time. If you’re doing a theme, this will also give your invitees a chance to get their attire ready.

Also, consider personalities and relationships when selecting your invite list. Inviting four of your closest, but shy friends who don’t know each other may lead to awkward conversation gaps. That’s not to say everyone has to know everyone, but everyone should know at least one other person (besides you) well enough to make conversation. We’re not a fan of assigning seats at the table, because if there’s a great conversation flow during appetizers, there is no need to break it up.

4. Beverages Need Love Too

Drinks are the final piece of the menu but are also the easiest to pull together. For most groups, a full bar with top-shelf liquor isn’t necessary. Simply making a signature cocktail or two that fit with the menu, a wine option, and one non-alcoholic choice should be enough to please most. Pitchers of water on the bar during appetizers, and on the table for dinner are also an accommodation that can be overlooked easily.

5. Enlist Help

A second set of hands on deck may be the single most important thing you can do for your sanity when planning a dinner party. Recruiting a roommate, spouse, or friend to be your “right-hand man” for last-minute grocery store runs (there will always be at least one), helping plate and serve food, and greet guests will go a long way in feeling more put together. Even if you never need them, it will be comforting knowing you have a backup.

6. Don’t Sweat the Small Stuff

Things will happen. Your best friend will show up with a new gluten-free, vegan diet, your decorative candle will get knocked over and scorch your table linens, or your cousin will bring a guest without any prior warning. For better or for worse, these are all a natural part of the entertaining process. If you laugh it off and move on, we promise your guests will too and be more focused on your overall awesomeness than any flubs. The one thing you won’t have to worry about is your food turning out great—we’ve got that part of it covered.


Slow Cooker Pineapple Coconut Cake

Slow Cooker Pineapple Coconut Cake
Pineapple Coconut Cake

Your Key Ingredient:

NESCO 6 Qt. Slow Cooker

Grocery Ingredients:

Cake

1 (16.5 oz) package yellow cake mix
1 cup water
3 eggs
½ cup melted butter (1 stick)
1 cup drained crushed pineapple from a 20 oz can (save juice and remaining pineapple for the glaze)
1 cup coconut
¼ cup chopped pecans

Glaze

1 ½ cups powdered sugar
Remaining juice and pineapple from the above can of crushed pineapple ( ¼ cup melted butter ½ cup coconut)
¼ cup chopped pecans

Instructions:

  1. Add the cake ingredients into a large bowl and whisk until the batter just comes together. Do not over mix – some little lumps of cake mix are fine.
  2. Spray the NESCO®  Slow Cooker with non-stick spray and pour in batter. Cover and cook on HIGH for 2 hours, keep the lid.
  3. After 2 hours, turn off the Slow Cooker and make the glaze. Add the powdered sugar, remaining pineapple, melted butter, coconut, and chopped pecans. Whisk until a sauce forms.
  4. Pour mixture over the warm cake. Let the cake sit for 5 minutes before serving.


Why You Should Be Eating Jerky

Turkey Jerky

The next time you need a snack to bring to a party, hiking, or just hanging out, grab your NESCO Dehydrator and whip up some jerky. Even though it’s a wildly underrated snack, it brings way more to the table than most snacks because it’s savory, salty, and healthy.

Homemade Jerky In A Mason Jar


Jerky is a Low-Carb, High-Protein Food
Studies have shown that a high protein, low carb diet can lead to a healthier lifestyle. Protein keeps your metabolism running smoothly and leaves you feeling satisfied, keeping cravings at a minimum.

No Unnatural Chemicals or Preservatives

Jerky, especially homemade, is free of unnatural dyes, chemicals, and weird preservatives. Typically, jerky only has three ingredients—meat, cure, and spices. Making your own jerky is an easy way to control the chemicals you and your family put into your bodies.

Jerky On NESCO Dehydrator Close Up
Ground beef ready for dehydration

Satisfy Your Salt Cravings, Without Going Overboard
It doesn’t matter how healthy your diet is, salty food cravings are real. Don’t overdo it with unhealthy snacks like potato chips, cheese puffs, or pizza. Quash your salt cravings with a serving of beef jerky, it’ll satisfy your taste for salty foods while actually giving your body fuel.

Jerky Is Easy to Bring Anywhere
There’s a reason hikers and cyclists use jerky to keep moving throughout the day. It’s lightweight and easy to carry, just keep it in a plastic Tupperware container or zipper bag for up to two weeks.

There Are Endless Flavor Options
Create unique flavor varieties that can be mixed and matched with NESCO’s variety of seasonings. Find your favorite flavor or mix them together to create your own unique blend. You can also experiment with different types of meat, like turkey, bison, or even tofu. Experimenting with different flavors and textures lets you find the perfect blend that suits you best. Jerky is the pizza of the snack meat world, there are a million different varieties and they’re always great.


8 College Apartment Kitchen Essentials You’re Probably Forgetting

Student Taking Notes

Moving on your own for the first time can be tough. Not only do you have to figure out how to use a washing machine on your own, but you also have to fully stock the place with all the essentials a college student needs. When you’re trying to get ready for the big move and a new school year, it’s easy to forget things, so we’ve come up with a list to make it easier:

1. Pots and Pans: A staple of any kitchen, pots, and pans should be one of the first things you buy for your first kitchen. You don’t need anything too fancy or extensive, just a few sizes of each.

2. Can Opener: Living with your parents for the first 18+ years can lull you into a false sense of security that there will always be a can opener close by. It’s disappointing when you get home from your first trip to the grocery store and you can’t get into any of your canned goods without the proper equipment.

3. Slow Cooker: Class all day and studying all night can leave you with little time to cook. Don’t resort to eating fast food for every meal. A Slow Cooker will save you time and hassle and money (those burger runs add up). Just throw your ingredients in before classes, set your temperature, and come home to a prepared meal.

4. Measuring Cups: Cooking is a lot easier when you know how much of everything you’re putting in. Measuring cups don’t have to be fancy, in fact, you can usually get them at the dollar store.

5. Basic Cooking Utensils: Spatulas, mixing spoons, a set of knives, and a pasta spoon will do wonders to make your life in the kitchen easier. These also don’t have to be anything extravagant (just make sure that everything is heat-resistant).

6. Vacuum SealerCollege students are busy, meaning you may not have time to cook with all of the groceries you buy. Don’t let them (and the money you spent on them) go to waste by vacuum sealing everything. This will also help keep your refrigerator clean and free of moldy, spoiled food.

7. Mixing Bowls: Large bowls come in handy for more than just mixing food. They can also be used for serving, holding fruit, or soaking small dishes without blocking the sink. Metal or glass will last a lot longer for just a little more money.

8. Pizza Cutter: Don’t be caught without one. It can only lead to disappointment.


Queso Blanco Dip

This Queso Blanco Dip has just enough kick to keep things interesting, but it’s mild enough for anyone. It’s perfect for parties, tailgating, or just hanging out on the weekend. The salsa verde adds texture and heat, while the cream cheese and sour cream create a smooth texture and a balance to the spice. This dip is full-flavor without the burn. If you’re a spice lover, adding diced jalapeños takes things up a notch.

Your Key Ingredient:

NESCO 1.5 Qt. Slow Cooker

Grocery Ingredients:

16 oz cream cheese
32 oz salsa verde (medium)
7 cloves minced garlic
3 cups sour cream
16 oz package shredded cheddar jack cheese
Chopped green onions for garnish
Tortilla chips or veggies for dipping

Instructions:

  1. Combine all ingredients in NESCO® Slow Cooker. Cook on low heat for 3 hours, stirring every half hour.
  2. Dip is ready when all ingredients are heated through and well blended. Garnish and serve immediately.


6 Ways To Get The Most Out Of Your Garden This Summer

Boy Gardening

You work hard in your garden all summer to grow your fruit, veggies, and herbs – don’t let them go to waste by not taking care of the finished product. We’ve come up with six ways to get the most out of the fruit of your labor.

1. Harvest at the right time.

Picking herbs, fruit, and veggies at the right time of the season is the key to keeping them fresh. The best time of year depends on your time zone and crop varieties. For most produce, harvesting just before peak ripeness is ideal for preventing over-ripeness and rot. Harvesting is best done either early in the morning or later in the evening to keep yourself and your crops cool. After picking, most crops should be taken out of direct sunlight to avoid wilting. It can be helpful to bring bunches indoors every so often to give you and your crops a break from the sun and heat.

2. Don’t wash your harvest immediately.

It’s tempting to get everything inside and immediately give it a quick rinse to clean them, but don’t! Moisture promotes bacteria growth, which speeds up the decomposition process. Instead of washing or rinsing, brush soil off as you pick to keep your kitchen clean AND keep produce fresh. If you can’t resist rinsing, make sure to dry crops thoroughly before storing them to avoid bacteria growth.

3. Store fresh crops properly.

How you store your fruits and vegetables is the most important factor in how long they will keep. While there are some general guidelines for keeping things fresh, every species within the same type of crop is a little different. Storing may take trial and error before your perfect the process. Here are some general rules for common types of crops:

Tomatoes: Do not refrigerate. Rather, leave them on the kitchen counter in the open air to breathe.

Potatoes: Leave potatoes in the sun to dry, then brush off all of the dirt and soil to prevent molding. Store in a cool, dark, and dry place like a cupboard or dry basement until ready to use.

Carrots: Carrots are similar to potatoes. You should also store them in a cool, dark, and dry area after being dried out. Just don’t leave them out in the sun after uprooting because they have thinner skin than potatoes.

Garlic & Onions
: Store in a cool, dark, and airy place like a cupboard. Make sure they are thoroughly dried
and the stems are cut off before storing.

Zucchini and Cucumbers: Both zucchini and cucumbers store better in the refrigerator than at room
temperature. Just be sure to dry their skin thoroughly because moisture can cause quick decay.

Pumpkins & Squashes
: Pumpkins and squash vary greatly by species, but they can generally last up to several months if properly stored in a dark and dry environment. Before storing, make sure that all moisture is
removed from the skin and wipe away any dirt that could contain additional moisture.

Berries: Strawberries, raspberries, and blueberries should all be sealed in an airtight container and left in the
refrigerator. Berries keep better in shallow containers with fewer layers to avoid crushing the delicate fruits.           Place a paper towel in the bottom of the container to absorb any moisture that may drip.

Leafy Greens: Spinach, lettuce, and kale should be harvested as needed. They only keep for a few days before
wilting. When harvested, keep them in a humid veggie drawer in the refrigerator.

Herbs: Herbs can be stored for up to 10 days. Simply put the stems in a glass of water like a bouquet of
flowers, and wrap the exposed leaves in plastic wrap. While most herbs should be placed in the refrigerator for maximum longevity, cold-sensitive herbs like basil should be left at room temperature.

4. Seal in the freshness.

Vacuum sealing can keep almost anything fresh for longer. It slows decomposition and bacteria growth by eliminating oxygen flow to food. Just ensure that everything is dry before sealing to reduce bacteria that thrive in moisture. Vacuum sealing can also eliminate freezer burn if you’re freezing fresh crops.

5. Know when your crops are no longer safe. 

While it’s tempting to save your crops for as long as possible, take care to know when they have run their course. Produce can grow and harbor bacteria that reduce quality and even make you sick. Sliminess, mold, discoloration, and rot can all indicate that your produce should be tossed in the garbage or compost.

6. Prepare harvest carefully.

You’ve worked hard to grow and care for your crops, so see the process through. Wash them thoroughly before placing them on your Dehdyrator. Homemade dehydrated goods are more nutritious and flavorful than store-bought and make for a great snack. Use a combination of dehydrating and vacuum sealing to help your hard work last all through the winter months. 


The 85-Year Journey Of A Roaster

Mary Rakunas is the life of the party and the glue that holds her family together. She’s always in charge of hosting her family’s holidays, a responsibility she took over from her mother, Grandma Bee. Also taken over from Grandma Bee is the family NESCO Roaster Oven. The origins of the Roaster are a mystery – all Mary knows is that it was probably purchased sometime shorting after Grandma Bee’s wedding in 1934. For nearly 85 years, that Roaster Oven was brought out for every holiday, barbecue, baby shower, graduation, or special gathering.

Grandma Bee’s Roaster Oven became a symbol of bringing the Rakunases together. As Grandma Bee got older, Mary took over the duties of cooking and hosting the family gathering with the Roaster. Today, she continues to roast potatoes, briskets, turkeys, and other family-favorites. There’s no doubt that the Roaster will be passed down to the next generation.

NESCO’s line of cookware may have grown since Grandma Bee’s Roaster was made in 1934, but our commitment to bringing people together around a quality meal certainly hasn’t changed. Nothing makes us happier than knowing that we help make your Thanksgiving turkey and Easter ham perfect. Today, schedules are busier than ever, making it harder and rarer to get everything together. Let us help you make it easier to enjoy quality time and focus on family. Rely on our expansive selection of Pressure Cookers, Slow Cookers, Dehydrators, and more NESCO at your next gathering, just like Mary.

Grandma Bee and her husband, before she was "Grandma Bee"
Grandma Bee and her husband, before
she was “Grandma Bee”
Grandma Bee celebrating Valentine's Day in 2010
Grandma Bee celebrating Valentine’s Day in 2010


45-Minute Ribs And Coleslaw

Ribs are a classic American dinner that everyone loves. The only problem with making ribs for the whole family is how much time it takes to cook them perfectly. Let NESCO cut down your cook time with our Pressure Cooker, available in multiple sizes. For the perfect dinner, serve these ribs with a side of homemade coleslaw (although we cheated and used pre-made dressing).

Your Key Ingredient:

Grocery Ingredients:

Ribs

10 lbs bone-in ribs, defrosted and cut up
2 bottles smoky barbecue sauce
2 cups ginger ale
1 bay leaf

Coleslaw

1 large head white cabbage
½ head red cabbage
2 cups baby carrots
1 bottle coleslaw dressing

Instructions:

Ribs
  1. Place rack in NESCO® Pressure Cooker. Layer ribs and barbecue sauce in Pressure Cooker, using about ¼ cup of sauce in between each layer. Add ginger ale and bay leaf.
  2. Set Pressure Cooker to HIGH and timer to 30 minutes for tender ribs, or 45 minutes for fall-off-the-bone.
  3. When timer is done, release pressure and carefully remove ribs from Pressure Cooker. Brush ribs with remaining barbecue sauce and serve.

Coleslaw

  1. Slowly feed cabbages and carrots into a food processor until all are shredded.
  2. Transfer to a large mixing bowl and add coleslaw dressing. Mix well.


Mother’s Day Frittata

Mother's Day Frittatas

Mother’s Day Frittata

Your Key Ingredient:

NESCO 12 Inch Electric Skillet

Grocery Ingredients:

1/2 cup of fresh or fully cooked maple sausage links, sliced and browned
1 cup of diced potatoes, browned until tender
6-8 large eggs
1/3 cup milk
1/3 cup dehydrated mushrooms
1/3 cup dehydrated tomatoes
1 Tbsp of Italian Seasoning
1/2 cup of cheddar cheese
Salt and pepper to taste

Instructions:

  1. On medium heat brown the sausage and potatoes and set aside.
  2. In a separate bowl, whisk eggs and milk together. Add all ingredients to NESCO® 12 Inch Electric Skillet and stir just until everything is mixed well.
  3. Set temperature to medium heat and cook for 5-7 minutes, or until center is firm. Remove from Skillet, cut, and serve fresh.


Chicken Mole And Mexican Rice

Chicken Mole And Mexican Rice
Chicken Mole

Your Key Ingredients:

NESCO Pressure Cooker
NESCO 8 Inch Electric Skillet

Grocery Ingredients:

Chicken

6-8 boneless chicken breasts, defrosted
1 teaspoon garlic powder
1 teaspoon poultry seasoning
2 cups water

Mole Sauce

2 Tablespoons vegetable oil
2 cups finely chopped onions
¼ cup chili powder
3 Tablespoons light brown sugar
1 teaspoon salt
1 teaspoon pepper
Pinch of ground cloves
1, 16 oz can diced tomatoes
3 Tablespoons cocoa powder
3 Tablespoons peanut butter
2 cups water

Mexican Rice

2 cups white rice
1 Tablespoon oil
1 teaspoon garlic
1 teaspoon cumin
1 ½ teaspoon salt
16 oz tomato paste
4 cups water
2 cups frozen peas and carrots

Instructions:

Chicken
  1. Add water to NESCO® Pressure Cooker. Place chicken breasts on wire rack in cooker and set regulator knob to PRESSURE. Set Cooker to HIGH temp for 5 minutes and press START. Timer will not begin counting down until ideal pressure is reached.
  2. Ensure that internal temperature of chicken reaches 180°F for doneness. When finished, release the pressure but leave chicken in cooker to keep warm.
Mole Sauce
  1. In NESCO® 8 Inch Electric Skillet, heat oil over medium-high heat. Add onion and cook until onions slightly are browned about 10 to 12 minutes.
  2. Stir in chili powder, brown sugar, cloves and cook for 2 minutes, continuing to stir.
  3. Mix in tomatoes, cocoa powder, peanut butter, and water. Let simmer over medium-low heat for 15 minutes, or until desired thickness is achieved.

Mexican Rice

  1. Preheat skillet to medium-high and add oil. Reduce heat to medium, add rice, stirring constantly until lightly brown, about 3 minutes.
  2. Stir in garlic, cumin, salt, tomato paste, and water. Raise heat to medium-high and bring to a boil. Cover and cook until rice is tender.
  3. Add peas and carrots, and cook for another 5 minutes. Fluff with a fork and serve.


Oriental Cashews

Cashews
More and more you read how nuts are a good source of vitamins and nutrients. This recipe for Oriental Cashews made in your NESCO Dehydrator is great tasting as well as a healthy snack. Also, try these delicious cashews on a salad for a wonderful crunch.

Let us know what you think. What are some of your favorite snacks you like to make in your NESCO Dehydrator?

Your Key Ingredient:

NESCO Dehydrator

Grocery Ingredients:

12 oz can dry-roasted whole cashews
1/3 cup soy sauce
1/4 cup water
2 Tbsp garlic powder
1/4 tsp powdered ginger

Instructions:
  1. Place nuts in a 9-inch square pan. Combine remaining ingredients and pour over nuts. Let sit at room temperature overnight.
  2. Drain liquid from nuts and place on NESCO® Dehydrator tray.
  3. Dry at 145º F for 3 to 5 hours or until nuts are crunchy. Store in an air-tight container.


Spaghetti Dinner

Spaghetti Dinner In Pressure Cooker
This recipe for a wholesome spaghetti and meatball dinner is extremely easy in your NESCO® 8 Qt. Pressure Cooker. Simply add all the ingredients in the order of the recipe, lock the lid, and set. In only 10 minutes you have a wonderful meal.

Let us know what you think. What are some of your favorite meals you like to make in your NESCO Pressure Cooker?

Your Key Ingredient:

NESCO Pressure Cooker

Grocery Ingredients:

1 ½ cups spaghetti, break in thirds
1 ½ cups water
1 ½ cups spaghetti sauce
16 frozen meatballs
1 cup sliced black olives or whole
2 tsp olive oil
Optional: top with parmesan cheese

Instructions:
  1. Pour all ingredients in the order listed into the cooking pot of your NESCO® Pressure Cooker.
  2. Lock lid into place and set the pressure regulator knob to SEAL. Cook on High for 10 minutes. Makes 4-6 servings.


Easy Cheesy Broccoli & Cauliflower

5 Quart Steamer With Rice Bowl Easy Cheesy Broccoli & Cauliflower

The NESCO® 5 Quart Steamer with Rice Bowl makes this Cheesy Broccoli & Cauliflower recipe simple and tasty. The rice bowl is used here to make the creamy cheese sauce that is oh so delicious. The sauce is made right inside the steamer along with your perfectly cooked vegetables.

Try it and let us know what you think. Also, let us know what are some of your favorite foods you like to make in your NESCO Steamer.

Your Key Ingredient:

NESCO 5 Qt. Steamer

Grocery Ingredients:

1 lb broccoli, cut into florets
1 lb cauliflower, cut into florets
4 Tbsp butter or margarine
1 cup soft cheddar cheese spread
1 cup prepared white sauce
1 tsp white pepper
1/2 cup thinly sliced red peppers (optional)

Instructions:
  1. Place 1 cup water in water reservoir (base of unit) of NESCO® 5 Qt. Food Steamer. Place broccoli, butter, and cauliflower in lower steamer basket. Cover and steam for 20-25 minutes.
  2. Mix together cheese spread, white sauce and pepper and pour into rice bowl. Place in upper steamer basket approximately 10 minutes before end of steam cycle to soften.
  3. To serve, pour cheese sauce over vegetables. Serves 6.


Party Coffee Ingredients

25 Cup Coffee Urn Party Coffee Ingredients

At your next party, treat your guests to a cup of Fresh Brewed Coffee from your NESCO 25 Cup Coffee Urn. Also trying swapping cream and sugar for these delicious coffee additions!
  • Chocolate syrup
  • Whipped cream
  • Cinnamon sugar or sticks
  • Dark or light rum
  • Almond or coconut milk
  • Ice cream
  • Cocoa powder


Cheesy Spinach Dip

1.5 Quart Slow Cooker Cheesy Spinach Dip

The NESCO 1.5 Quart Slow Cooker is perfect for making Cheesy Spinach Dip and keeping it warm on your party buffet table. To kick your Spinach Dip up a bit simply add the optional chopped Jalapeno peppers.

Your Key Ingredient:

NESCO 1.5 Quart Slow Cooker

Grocery Ingredients:

8 oz cup Monterey Jack cheese, cut into pieces
4 oz cream cheese, softened
5 oz frozen chopped spinach, thawed & thoroughly drained
1 large tomato, skinned, seeded, chopped
1/2 medium onion, finely chopped
1/4 cup half-and-half
1 whole jalapeno peppers, chopped (optional)
Crackers, cocktail rye bread, or fresh cut vegetables to serve

Instructions:
  1. Set NESCO® Slow Cooker to HIGH. Lightly wipe cook pot with cooking oil.
  2. In mixing bowl, combine all ingredients; stir until well blended.
  3. Spoon into preheated cook pot. Cover; bake 30 to 40 minutes or until center is set and edges are puffed.
  4. When heated, set control to AUTO.
  5. Serve warm with crackers, cocktail rye bread, or your choice of cut fresh vegetables. Serves 8 to 10.
Let us know some of your favorite slow cooker dip recipes!


Jet Stream Oven 2: The Perfect Frozen Appetizer Cooker

Jet Stream 2 Oven: The Perfect Frozen Appetizer Cooker

The NESCO Jet Stream Oven is perfect for making your favorite frozen appetizers. Enjoy everything from crispy egg rolls and mozzarella sticks to breaded mushrooms and onion rings. Cooking in your Jet Steam Oven is convenient and saves energy over a large conventional oven.

Try some of these tasty frozen food items in your NESCO Jet Stream Oven:
  • Crispy Egg Rolls
  • Pizza Rolls
  • Breaded Cheese Curds
  • Mozzarella Sticks
  • Breaded Mushrooms
  • Baked Pretzels
  • Onion Rings
  • Stuffed Potato Skins
  • Cream Cheese Wontons
  • Corn Dogs
  • Stuffed Taquitos
  • Mini Pizza Bites
Let us know some of your favorite frozen appetizers!


Party Mix

Roaster Oven Party Mix
One thing guests love reaching for at a party is a big bowl of party mix. NESCO Roaster Ovens help make a party mix simple and convenient. The possibilities of ingredients are almost endless.

Your Key Ingredient:

NESCO Roaster Oven

Grocery Ingredients:

10 cups crispy rice squares cereal
10 cups crispy wheat squares cereal
1 cup butter, melted
1/4 cup Worcestershire® sauce
2 cups peanuts
4 cups thin pretzels

Optional for melting butter
2 Tbsps of taco seasoning
1 clove minced garlic

Optional add-ins
Diced pieces of dehydrated fruits or veggies
Roasted pecans, cashews, or almonds
Toasted pumpkin seeds
Coated chocolate bites
Granola clusters
Toasted coconut
Cheese puffs
Crispy Asian noodle pieces
Broken pieces of tortilla chips

Instructions:
  1. Preheat NESCO® Roaster Oven to 300º F. Place cereal in cookwell. Stir butter and Worcestershire® sauce together and pour over cereal.
  2. Cover and bake at 300º F for 45 to 60 minutes. Stir occasionally during baking. Add nuts and pretzels. Cool before serving or storing in airtight container. Serves 50.
Let us know some of your favorite party mix recipes or tasty added ingredients!